
Let’s say you decided to pull the trigger and you want to build an arcade machine for your home/office. Listed below are many initial decisions you will want to consider in regards to the actual physical arcade cabinet.
- How many players do you want your cabinet to support?
- Almost all builds are either 2 or 4 players
- What design do you want for your cabinet?
- Full Upright cabinet
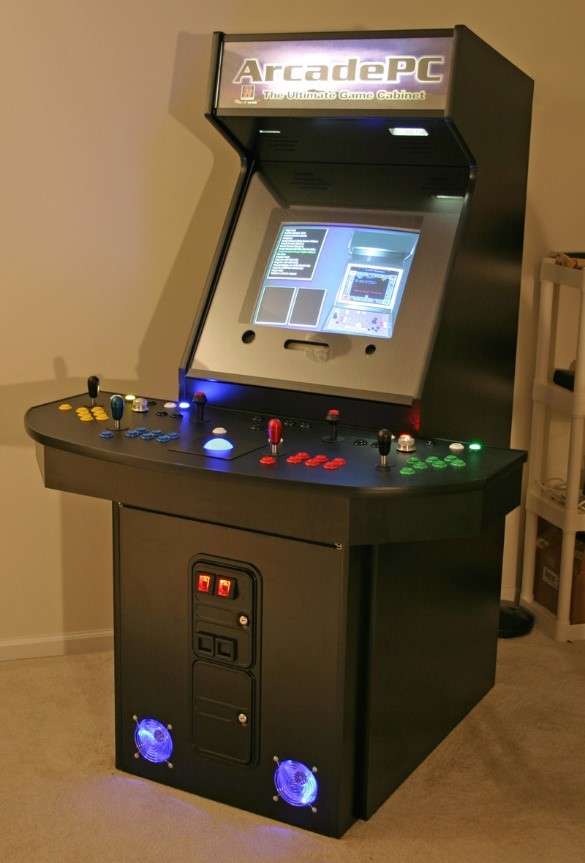
- Most common cabinet that you would remember from old arcade shops where you stand in front of the device.
- 2 or 4 player options
- Bar top/Tabletop cabinet
- A more mobile cabinet that sits on a bar top/table. Much easier to move around if needed.
- Usually only 2 player options
- Cocktail Table
- Similar to a coffee table in size, each person sits on a chair and looks down at the table to play, commonly used to play games while having some drinks or something to munch on.
- How do you go about building the cabinet?
- Building it yourself from plans online
- Only recommended if you are familiar with wood working and have the tools necessary for cutting out your cabinet and assembling it
- Full built solutions
- Many online retailers offer fully designed and built arcade machines that are finished and require little to no work to be operational. Great if you are on a time limit and don’t care to do the work yourself
- Precut Kits
- Some online retailers will sell just their cabinet kits so you can do the building and designing yourself. These are helpful if you want to save some money and assemble/configure it yourself, but don’t have the tools to cut the wood yourself.
- Building it yourself from plans online
- Full Upright cabinet
Since I wanted to have lots of control over my software configuration and I plan to have my friend do the graphics design, I chose to go with a Precut Kit from Northcoast Custom Arcades. (https://www.mameroom.com/webstore_home.asp)
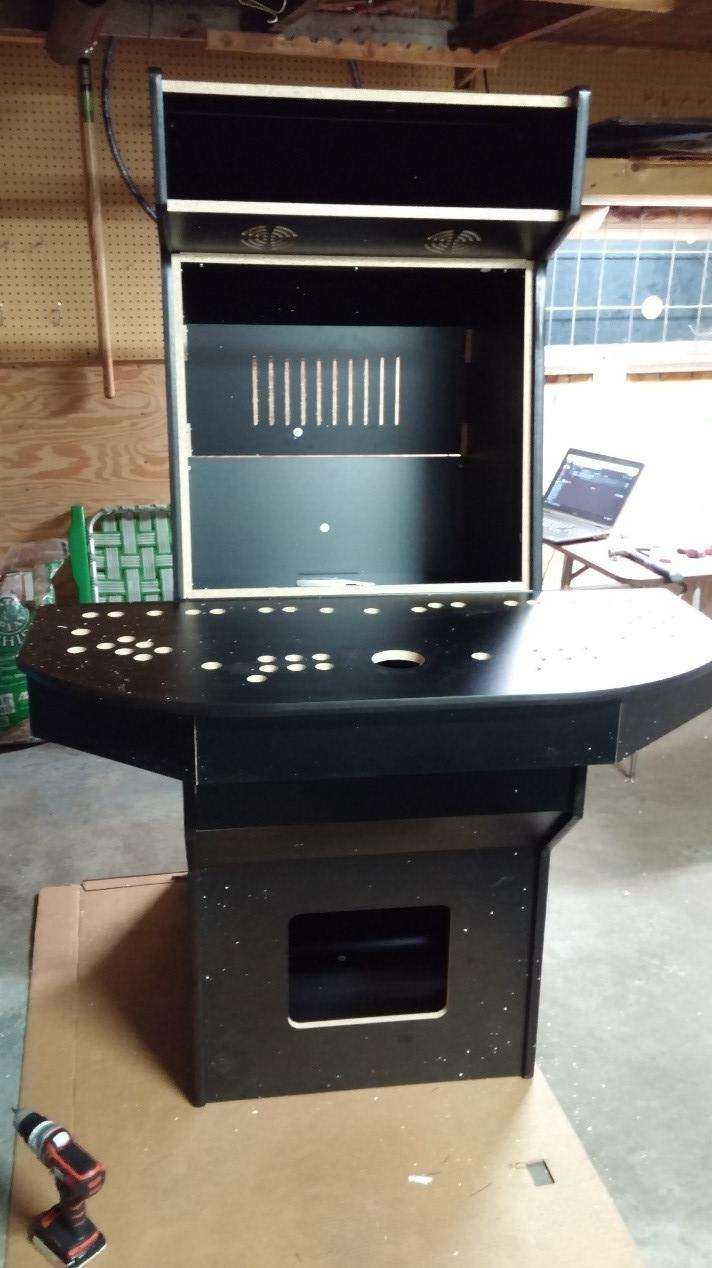
They offered what I needed with their precut kits where I could assemble the cabinet myself which allowed me to keep my costs down. I ended up purchasing their upright standard kit as well as a 4 player controller kit. Once they arrived, I began unpacking them to see what I had.
All of the parts were labeled based on how they fit together which made for a very easy setup. I started with the controller board first.


After cleaning off most of the Styrofoam crumbs that shipped with the panels, first task was to install the T-molding which would protect the edges of the wood from damage.


Once the T-molding was finished, the next step was to assemble the rest of the controller box.


Once the bottom was installed we are ready to set the controller aside and start working on the actual cabinet. Construction began on the bottom half, where the computer will be housed.


From here the full cabinet comes together and we can now start working on the insides such as the monitor and speaker mounting. I built a small wooden shelf for the speakers to sit on so the sound comes through the center of the holes in the cabinet.

I took measurements and found that a 27-29 inch monitor would fit best in the space. Here it is sitting inside the cabinet while I’m testing the color and height that I want it to be mounted at.

I installed wooden backers to hold the monitor in place. From here I added duct tape to keep it from moving before adding the bezel in which will give it the finished look all around the openings above and below.


Finally added the bezel so it looks more polished. For the bezel I just bought some foam board and cutout the center based on where the monitor was sitting so I’d have a perfect fit. Once the bezel is on I just mounted the plexiglass over the entire opening and secured it to the cabinet.

This finishes the basic build of the cabinet outside of the buttons in the control cab and mounting the marquee, but these pieces will come later as we still need to get the PC built and tested before we can configure the controls and finalize the art that will be used for the cabinet.
Check back for Part 3!