Recently, we were in need of a rootable phone for a mobile penetration test we were performing for a client. We have a blog post on specific Android configurations for mobile application penetration tests, but for this post, we want to demonstrate how to root the Google Pixel 4a smartphone.
Pre-Requisites:
Step 1
- Unlocking the bootloader
- Navigate to the following areas of the phone:
- System Settings
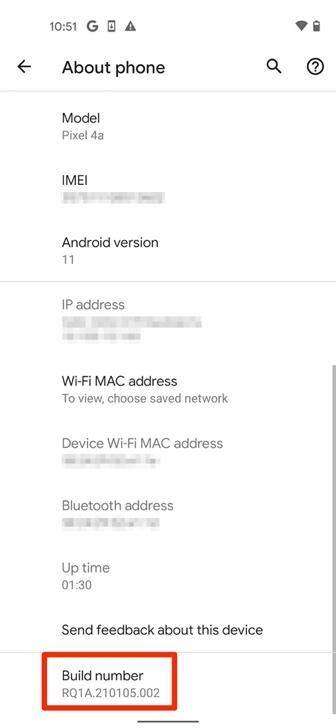
- About Phone
- Scroll down to “Build number”
- Tap “Build number” seven times
- System Settings

- Back out to the main system settings area – navigate the following options:
- System
- Advanced (drop-down menu)
- Developer Options
- Enable “OEM Unlocking”
- Boot into Fastboot mode:
- Shut the phone completely off
- Start phone by holding the power button + volume down button
- Plug phone into the computer
- Utilize OS-specific platform toolset for the next part (Mac referenced material now):
- Open up Terminal and change into the platform-tools folder
- Running the following command to unlock the bootloader
- ./fastbook flashing unlock
Step 2
- Patching the boot image
- Utilizing the Google Pixel 4a performing the following
- Open Google Chrome
- Navigate to the following URL:
- Download the correct version of the ROM currently installed
- Determine ROM version by the following:
- Settings -> About phone -> Build number
- Determine ROM version by the following:
- Navigate to the downloads folder utilizing the “Files” application
- Extract the ROM ZIP file
- Within the extracted files – extract the new ZIP file
- Now there will be a “boot.img” file that will be utilized in the next section.
- Extract the ROM ZIP file
- Installing Magisk Manager
- Download and install Magisk Manager using the following URL:
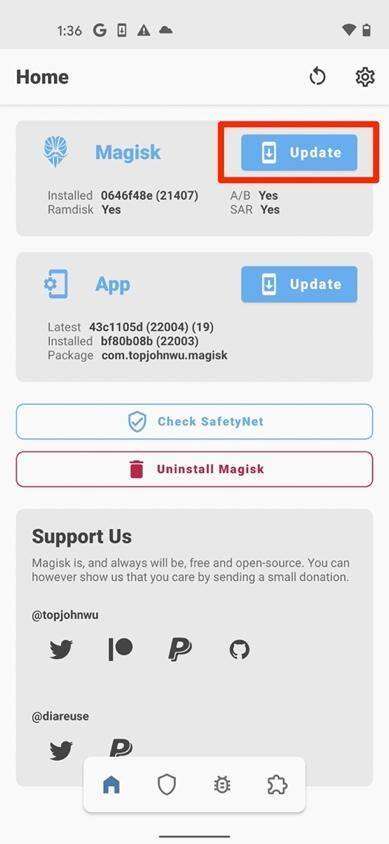
- Open Magisk Manager
- Under the Magisk section
- Click the “Update” button
- Under the Magisk section
- Utilizing the Google Pixel 4a performing the following

- Select “Select and Patch a File”
- Navigate to the “boot.img” file and select it
- The Magisk application will patch the file and output it to the downloads folder
Step 3
- Flashing the patched boot image
- Upload the patched boot image from the Google Pixel 4a to the computer
- Boot the Google Pixel 4a into Fastboot (refer to step 1 for more information)
- Open up Terminal on the computer (Mac):
- Copy the patched boot image to the Google Platform Tools directory
- Run the following command: (Replace “migisk_patched.img” with the name of the patched boot image file)
- ./fastboot flash boot magisk_patched.img
Step 4 – ROOTED
- Reboot the phone and…
- You have successfully rooted a Google Pixel 4a!
MORE FROM OUR TECHNICAL BLOG
Cyber Advisors specializes in providing fully customizable cyber security solutions & services. Our knowledgeable, highly skilled, talented security experts are here to help design, deliver, implement, manage, monitor, put your defenses to the test, & strengthen your systems - so you don’t have to.
Read more from our technical experts...


